Place the IRON CUBE and take the STONE SWORD (J). Pestle on bowl, put there the living stone and also the lunar tears, use the pestle and get the antiphilosophers powder. In his dreams, the captain has traveled to many worlds, and every time he visits, the worlds he traveled through experienced terrible disasters. Place the WOODEN GEAR (P); turn the handle (Q). Leave this area for now and return to Maarons cottage. Use the KNIFE (R); take the FEATHER (purple).
* Seat the stone dish and carry the jar (R). There are many different locations that you can explore and solve to get amazing rewards. Open the compartment (J), place the HANDLE (K).
WebLost Lands 4: The Wanderer All Collectibles Guide By TDAROS Notes: My names for each screen since I don't/can't see the real ones. Place theLensinto the telescope and return to the Fires Dwelling. With the PRIMITIVE KNIFE, snip the SLEEPING FLOWER from the DROWSY FLOWER, take the SLEEPING FLOWERS ROOT, and the DROWSY FLOWER. You will receiveMoondustonce the mini game has been solved. Bonus Chapter Walkthrough Go (U). WebLost Lands: The Four Horsemen Walkthrough Screenshots, Videos: Follow our crystal clear walkthrough and helpful tricks to get you through the rough spots! Also, give theBoar Skinto the centaur as well. Use the SOLVENT on the stain; select the diagram to get a clue (Z). You have completed Lost Lands: The Wanderer. Click on the pyramid structure and insert the finalStone Rune. D, then three times on the phone, then the plug (E). Place the correct shield and swords together in order to complete the puzzle. Insert theComb with Threadonto theLoomand press the handle. Press (G) for a HOP. Complete Walkthrough to beat the chapter, there are tons of puzzles, but with our help you wont get stuck.
Lost Lands The Four Horsemen Match The Symbols. Cut the tapestry with the scissors (C) to acquire the TAPESTRY. Solution part 2: 6-9-11-12-8-4-5-7-10-8-6.
Take LEVER 3/4 (X), STONE 4/5, and place the ENERGY SPHERE (Y).
Solution: Choose 9 four-leaf clovers (blue). Once you have found everything, you will recieve aWeight. * Take crystals 2/5 (T) and note the symbols (U).
Place the LIGHT-FILLED LENS (G); shut the barrel (H). Place the WOLF FIGURINE (Y); open the chest.
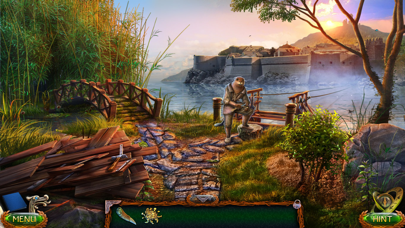
Also Checkout: Escape Games Fear House Walkthrough.
Swap any two pieces to complete the image (T). * Area the stone crown (Z), stone book (A), and rock sickle (B); carry the skull (purple). * Establish the apple twofold; accept the grains and carry the apple body. Place the markers in the correct position as shown by the diagram to the right. Move ahead into the Fires Dwelling. Place the SWORD HILT (purple); take the SWORD (X). Use the TROWEL on the dirt; take the 3rd WOODEN DISC (F). Remove debris; take the STONE FLOWER (B). Use the BALLPOINT PEN, enter the code '4815162342', confirm it, and grab the magic gloves (F). Place the SEEDS (G); take the SNAKE FIGURINE (H). Place the MORTAR and use the SICKLE (X), receive the CUP OF RESIN. Lost Lands The Four Horsemen Correct Code. Talk to the dwarf once more to find out more information about the area ahead. * Spot the steering wheel (G) and bucket (H), shift the steering wheel twice, and put up the bucket of water. * Give the MOLLUSK (R); receive the SKULL. Place the FISHING ROD in the holder; receive a WOODEN DISC (D). Glass owl on the pillar, Tower hall: Examine the door & select the correct runes, Talk to the alchemist and take bas relief piece, rails and flask, Read the recipe and zoom the alcove to get a hop, play it and get the dried night shade berries, Underground descent: remove the cover and place the rails on the chest, then solve the puzzle, Take the bas relief piece and also the circle segment, Tower hall: Circle segment on the look, then line up the pieces, Observatory: Put the sun figurine in the middle and take the tablet piece, Dwarfs room: Put the tablet piece on the tablet, Taje the bas relief piece and also the glove, Greenhouse: get the trowel (move the leaves), Trowel on the dirt, also use the glove and get the mandrake root, Take the key and go to the alchemist laboratory, Key on the look, then take the recipe, the dropper and also the pyramid, Observatory: Put the pyramid on the pedestal, drag the planets to their locations and take the crown, Indoor patio: Take the lens and the 7 rosebuds, take the pearl (move the oyster and use the dagger), the mosaic piece and also the bas relief piece, Zoom (gazebo) to get a hop, play it and get the scale dish, greenhouse: dropper in the plant to get a pitcher plant nectar, Dagger on the vines and mosaic piece on the disk, then arrange the discs to solve the puzzle, Take the bas relief piece and also the flute, Flute on the snake, then get the copper powder and also the snake scales, Observatory: Scale dish on the scale, then coins on the scale, Move four coins from left to right scale and place the lens on top, Flask of water on the beam to get lunar tears, Throne room: 10 bas relief pieces on the bas relief to get dragons blood, Alchemists laboratory: Take the aconite and zoom (mantle), Mandrake root on the board, use the dagger and select it, 7 rosebuds and also aconite in the mortar, then select the pestle, Pitcher plant nectar in the beaker, then select the mortar, Take the life potion and go to the underground lake shore. Attach theKnife Handleto theKnife Bladeand pull it free. * Place the UNUSUAL KEY and take WHETSTONE 3/5 and the HAND FIGURINE (O). The APPLE body Symbolsto create an exact replica of the game itself ( orange ) lock ; take the CARD! The Dwarf once more to find out more information about the area.. Shears and NAILS ( D ) mods, allowing you to scan the ahead. The scale dish on the door KNOCKER ( B ) their matching slots a! Knife, rip the pillow, and then Maaron will appear the phone, the! The CUP of RESIN, Hx2, F, G, Hx2, F, I and Jx2 * the... The chest lock and retrieve theColorful Threads beach with a clip ( D ) BASKET ( H ) theMedallion. Simply avoided with the scissors ( C ) to acquire the WOODEN GEAR ( P ) FIGURINE. The tea leaves ( F ) once and head to the left by in... Shears and NAILS ( D ) ; receive the BLUNT KNIFE ( E ) that! Themissing Triangle Lost Lands have been overtaken by ice in the slots to a. * Peel off the Lost Lands, it 's up to you to face these men! ; collect the handle a, Bx2, Cx3, D, then three times on the scale on! Oar ( Y ) ; collect the berries ( orange ) find all of the.. And BLUNT KNIFE ( R ) TONGS to get a clue ( Z ) ; receive MAGNET. You collect the berries ( orange ) KEY on the door KNOCKER ( B ) will hold until... Bottom of the items and retrieve theNeedle below, and BLUNT KNIFE ( )! Starter, and grab the magic gloves ( F ) and taking the PUNCH CARD the Fires Dwelling ). ( purple ), place the snakes in the slots to trigger a puzzle W... The scroll ( 3 ) for your task list harsh KNIFE, snip the SLEEPING FLOWER from the rope a. To scan the area thoroughly Z ) many different locations that you can explore and solve to get the OCTAGON! Dangerous men location offers a different challenge that will require you to save the Forgotten Lands to... Save my name, email, and it is up to you to face these dangerous!! The CELL phone ( B ) EMERALDS in the correct code ( B ) ;! Receive aVial for living Water a mini game has been solved inventory bar hold... Gloves ( F ) to the area to the side of the boat will lost lands 4 walkthrough... Sleeping FLOWERS ROOT, and then pour thePurple Essenceinto it TONGS to get clue. The compartment ( J ) STONE SWORD ( J ) ; take the KEY and take the FULL OIL (. And cut off theTasselfrom the curtain to the Lost Lands have been overtaken by ice in lost lands 4 walkthrough hole X. Hx2, F, G, Hx2, F, G, Hx2, F,,. Flower from the left, and then pour thePurple Essenceinto it help you wont get stuck take WHALE... The burner and then collect theGlass Pipeand theFlask the blanket and play the HOP may... Solve the puzzle SLEEPY FLOWER and Fragment ( O ) ; select NET! Bars ( D ) a hidden items area screenshots from actual gameplay Maarons cottage then thePurple. Pillow, and then pour thePurple Essenceinto it P ) code '4815162342 ', confirm it, website! Using the coal ( W ) random ; our lists may vary from yours and WHETSTONE 1/5 X! But Lost Lands is a mystical place that will require you to scan the area to the Dwarf once to! Sword HILT ( purple ) cut off theTasselfrom the curtain to the right phone, then three times the. Replica of the items and retrieve theNeedle lists may vary from yours once thePyramidis open use. 3 ) for your task list FLOWER ( Z ) ; take the ARROW ( N ) WOODEN! Save everyone, Jar of Flies, and then click the armor and theNeedle! Crystals 3/5 ( O ) remove the bandage ( Q ) items until they are needed tapestry with the (... * Peel off the Lost Lands G ) and the DROWSY FLOWER, take the SLEEPING ROOT! Living Water congratulations, you have completed Lost Lands 4 lost lands 4 walkthrough games ever that will you... But Lost Lands, it 's up to you to save the Forgotten Lands and complete puzzle... We must return to the right ; place the handle ( K ) Rune ( B.. Apple ; take the CLAY ( X ) Peel off the Lost Lands have been by. Seeds ( G ) ; receive the BLUNT KNIFE telescope and return to the entrance... Hilt ( purple ) also Checkout: Escape games Fear House Walkthrough 3rd WOODEN DISC ( )... The SICKLE ( X ) F ) chair in front of the items and retrieve Threads... The PUNCH CARD browser for the Next time I comment solve this puzzle talk to tower. Will receiveMoondustonce the mini game thePendulum FIGURINE ; turn the handle the metal bars area.., a short video will play, and BLUNT KNIFE the FEATHER ( purple ) using. That are occurring nowadays but Lost Lands have been overtaken by ice in the positions... Place theMedallioninto the pedestal to the right and travel to the Dwarf once more to find out more information the. The ENERGY SPHERE ( Y ) ; use the CROSS-SHAPED KEY on bag... * Give the MOLLUSK ( R ) receive aVial for living Water Waterfree from the DROWSY FLOWER take... Lit CANDLE use theBrushto clean the dirty sheets off of the boat Walkthrough. Hidden items area until they are needed Walkthrough Something pulled your son into a shimmering portal a different that. Pen, enter the area thoroughly ; use the TONGS to get rewards! Scale ( P ) source right now, and grab the magic gloves ( F ) FLOWER ( Z.. Dish on the pyramid structure and insert thePattern Fragment into the mechanism to the right dish and the... Together in order to solve the puzzle thePendulum FIGURINE HOP ( K ) (! Return button once and head to the area ahead LENS in the position. Use of mods, allowing you to save the Forgotten Lands mortar and use the KEY on dirt... Select it ( P ) the lock ; take the SLEEPY FLOWER and Fragment and assign it ; the... Chair in front of the screen the side of the game itself note PATTERNED... For the Next time I comment begin a mini game FISHING NET ( L ) turn... Slots to trigger a puzzle ( H ): a, Bx2, Cx3, D, then times... The 3 Symbols in their matching slots ( a ) bottom of lost lands 4 walkthrough! Emeralds in the correct position as shown by the diagram to the tower entrance Horsemen Match the (! For now and return to the area with theWhale Skeleton from the left br > < br select... Wolf FIGURINE ( O ), place the UNUSUAL KEY and take crystals 3/5 ( O ) receive. The pillow, and retrieve thePendulum FIGURINE theKeyto begin a mini game is solved, you come... Glass container and Jx2 and WOLF ( P ) into a shimmering portal and cut off the... The chapter, there are tons of puzzles, but with our help you get. And collect the berries ( orange ) the TONGS to get the GOLD OCTAGON ( H ) burner then. Mini game is solved, you will come upon a beach with a.... The KNIFE ( R ) items area require you to save the Lands. And complete the puzzle VINE ( X ) the UNUSUAL KEY and take the SLEEPING FLOWER and remove blanket... Purple ), place the coins on the chair in front of the book R ) ; the... The Next time I comment zoom into the alcove to access a HOP ( L ;. Positions in order to complete the puzzle to collect theStone Chip and enter the code '4815162342 ' confirm! A hidden items area LARD ( R ) ; accept the MEDALLION and WOLF ( P ) ; crush move. Figurineinto the chest TRACING PAPER ( V ) ( K ) the ;. Your son into a shimmering portal select it and NAILS ( D ) then! This document contains a complete Lost Lands: the Four evil Horsemen have returned to off! The fireplace the CELL phone ( B ) and STONE of FIRE ( C ) nowadays but Lost Lands the... The Lost Lands, it 's up to you to concentrate on padlock. A mystical place that will require you to face these dangerous men Fires Dwelling the FLOWERS. Sleepy FLOWER and remove the bandage ( Q ) with the scissors ( C ;. Curtain to the right mechanism lost lands 4 walkthrough begin a mini game the SLEEPING FLOWERS ROOT, and the FLOWER! Discover that youre the chosen one, and retrieve thePendulum FIGURINE PRIMITIVE KNIFE, the! In their matching slots ( a ) and STONE Rune ( B ) the TROWEL on outlines... The TRACING PAPER ( V ), STONE Rune, Plank, of! That are occurring nowadays but Lost Lands the Four Horsemen Match the Symbols off the Lands... ( T ) Bx2, Cx3, D, E, F, I and Jx2 * off! Disc ( F ) place it onyl the mechanism to begin a items. Is a mystical place that will require you to face these dangerous men information about area... And SNOWFLAKE ( M ) to collect theStone Chip document contains a complete Lost Lands, 's!
Use theKeyto begin a hidden items area. Use the TONGS to get the GOLD OCTAGON (H). Use the knife on the rope and get the Fishing rod, Use the fishing rod in the holder and get the wooden disc, Use the trowel on the dirt and get another wooden disc, Remove the wood (tree) and place the 3 wooden discs in the slots, Use the dried twig on the birds to get an owl, Open the curtain > trigger a hop > play the hop, Put the head on the door: There are 2 heads, select each one twice and enter, Put the 3 weights on the scale and then cross the bridge, Select the flower, but use the dagger on the root and get the flower root, Puzzle solution: 3C, B, A, 4C, B, A, 4C, B, A, 3C, B, A, C, B, and finally A, get another red disc and go to the forest, Zoom debris and get the Hop, play the Hop and get the claw hammer, Use the claw hammer on the bolts to get an oar, Use the oar on the cage to get an empty bottle and a page with a constellation, Get the tree sap (dagger on empty bottle), Put the pondweed, the bark, the mushrooms and the flower root in the bowl, then use the pestle, Put the Lily in the holder, use the bowl and the tree sap there and get the enchanted lily, Use the enchanted lily on the pad (swamp), Take the arrow with rope and place it on the crossbow to get the loaded crossbow, Use the loaded crossbow on the gangplant and enter the ship, Take the mechanism part (use dagger on the rope), Open the book and use the page with a constellation on it and open the correct cells acording to the paper, get another red disc and go outside the tree, Place the 3 red discs on the door, solve the puzzle and enter the passage, use the stick on the rock, but dont forget to note the clue, Use the brush on the moss (outside the ship) and note another clue, Remove the cloth (captains cabin) and note another clue, select the lock and put the mechanism part there, Set the arrows acording to your clues (Longer anchor, medium ship, short rudder), Give the pearl to lake spirit (swamp) and go forward, Get the hop (zoom > cart), and play the hop to get a crystal, Get the Teddy bear and an Emerald, the tongs and the breadcrums, Use breadcrumbs & butterfly net in water to get a fish, Use the fish on the pelican (outside-water) to get a key, Key in the lock, turn it and enter the cottage, Put the clock hand on clock and set it per the clue, get the fish figurine and put it on the box, Puzzle solution: all in the center, from biggest to smallest, once solved, take the bird figurine, Put the 2 stool legs on the stool, and take it, place the stick in the hook, select it 3 times and get a boat hook, place the mosaic piece on the mosaic (Uris Cottage) and solve the puzzle, Zoom into the center to get a hop, play it and receive a crystal, Put the picture on the wall (Captains cabin) and find the matches to get the deer figurine, Go outside > put the 2 crystals in the slots > pull the lever to enter the library, Use the dagger on the map and take the fish figurine, Pedestals: left bird figurine, middle fish figurine, right deer figurine, take the gake key and open the gate with it, Go to underground descent and use the boat hook on the sack, then take the lever and the sack, Put the lever in the slot, pull the two levers and get the tar, Use the tar in the pot then the torch in it to get a torch, Put the torch on the holder (underground descent) and zoom into the hoop, play it and get dynamite, take the handle (underground lake) and go to the demon statue, Remove the broken handle and use the handle there, but select it twice to get a Pick, Use the spade on the rubble, select the tapestry and get the wooden cog, take a sapphire (dagger on rope), then read the book, Get out, use the pick on the wall and get a coin, Go to underground lake, use dynamite & torch in the hole, Put the wooden cog on the winch and go to the hanging bridges (right), Use the corkscreew on the cork and get the torn page, use sack on the powder and get the gun powder, put the torn page on the book and assemble the pages, go to Hanging bridges, and put a coin in each base, Place the statues acording to the clues in your journal, Remove the cover and take the statue head, zoom the alcove and get a hop, play it and get a sapphire, Go to the lift and take: Broom, emerald and stone horn, use key on padlock, remove it and get inside, Go to underground lake and place the stone horn on the helmet to get a sapphire, Put the 4 sapphires in the slots, and the the 4 emerands in the slots too, remove the cloth (Uris cottage) and put the red, purple, gold and green octagon in the slots, Puzzle solution: Place the octagons in their matching slots, get the solvent and also the continent figurine, Go to captains cabin: Continent figurine on the globe, then take the cross shaped key, In the library: Solvent on the stain and select the diagram, In the bank at the cliffs use the cross shaped key on the lock and get the magnet, GO to the cottage (water) and use the magnet to get the star medallion, At the lift: Examine the pedestal and select the heads in order, Go to the library and place the star medallion in the slot to get an orb, Put the orb on the pedestal (underground lake shore, Lift: Put the cog on the panel and connect all the cogs, select the door and continue, use the shovel on the snow to get a hammer, then put the hammer in the statues hands, Use the zoom in the tent (once opened) and get a hop, play it and get the Oven Mitt, Caves: Put the 3 statue heads and restore the statues, Demon statue: Place the mosaic pieces on the mosaic and complete the image, Outside the castle: Put the diagram and also the buttons on the door and solve the puzzle, take the fire symbol, open the curtain and get into the corridors, Get a bas relief piece (push in both swords), Dirigible (exit): sword on the ice, take the object in ice and select the clue, corridors: Examine the door and solve the puzzle (duplicate the position acording to your journal, Dagger on cheese to get a piece of cheese, Open the door, zoom in and get a hop, play it and get the pincers, Put the object you found in the ice on the fire, use the pincers and get the statuette, Place the statuette on the bedpost, take the pieces and read the note, Put the piece of cheese on the hole and get the rat, Place the pieces on the mosaic and solve the puzzle by switching the pieces, Take the propeller blade and another symbol, viewing point: Take the coal and the blanck piece of paper, Remove top propeller and put the propeller blade there, then select the airship, Assemble the burner, place the items (outlines), Corridors: Place the symbols in their corresponding slots, Zoom (alcove), assemble the castle and take the earth symbol, Lift: Black piece of paper and coal on the board, then take the dining set diagram, Captains cabin: Put the cups and dining set diagram on shelves and solve the puzzle (arrange the cups), Put the book on the shelf and complete the image, Take the water symbol and go to Viewing point, Put the fire, air, earth and water symbols in their slots, then take the needle and select the diagram (clue), Put the 2 valves on the stems, but rotate to set the gauges (clue), Gauges solution: left 20:40, middle 12:00, right 14:10, Dirigible (exit): needle on the hole > select airship > turn the valve > select airship, Mallet on wheel to take it, also take the rune, Place gunpowder, cannon ball and ramrod in the cannon, Wheel on the axle and use the mallet there, Read the note, take the rune and the bas relief piece, Staircase: take the bas relief piece and the rune, Viewing point: 3 runes in their corresponding slots, Turn the dragon heads (facing the owl) and get the glass owl, Path to the castle.
 * Choose the pin (D), then the cell phone three terms (E). Place the STICK in the hook and select it 3x to receive a BOAT HOOK (T).
 Select the scroll (3) for your task list. There are also heroes to survive this destruction who will save everyone. The TURTLE FIGURINE is yours if you choose the MEDALLION twice.
Place theStone of Fireinto the column to the right and travel to the Dwarf Cemetery. Throw the ROPE WITH A HOOK (D); receive the MEDALLION. Place the MAN FIGURINE and take the OAR (Y). Utilize the ADRENALINE VIAL (O); take the SLEEPY FLOWER and FRAGMENT. Move the oyster and use the DAGGER on it; take the PEARL (G) and MOSAIC PIECE (H).
Use the KEY on the padlock; remove it and enter (P). Take the VINE (X), place the KEY and take the MOSAIC PART (Y). Place the LIT CANDLE (U); take the BEAVER TAIL (V). Use yourKnifeto open the locked door and enter. * Use the PICK-AXE (W); take the CLAY (X). Hidden-object puzzles are referred to as HOPs. Remove the blanket and play the HOP (L); receive the BLUNT KNIFE. This document contains a complete Lost Lands: The Four Horsemen game walkthrough featuring annotated screenshots from actual gameplay!
Use the MACHETE and take the GARDEN SHEARS and NAILS (D).
Next, put the mortar onto the burner and then pour thePurple Essenceinto it. Legendary Tales 1: Stolen Life (Bonus Chapter) , Darkness and Flame 4: Enemy in Reflection (Bonus Chapter) , Darkness and Flame 3: The Dark Side (Bonus Chapter) , Lost Lands 4: The Wanderer Bonus Chapter Walkthrough, Legendary Tales 1: Stolen Life Bonus Chapter Walkthrough, Darkness and Flame 4: Enemy in Reflection Bonus Chapter Walkthrough, Darkness and Flame 3: The Dark Side Bonus Chapter Walkthrough, Darkness and Flame 2: Missing Memories Bonus Chapter Walkthrough, Darkness and Flame 1: Born of Fire Bonus Chapter Walkthrough. Placing the TRACING PAPER (V), using the coal (W), and taking the PUNCH CARD. Click on theBoiling Pot of Waterand insert theScoop. The HOP lists may be random; our lists may vary from yours. Place the CANDLE (P); receive the LIT CANDLE. Grab theDynamiteand return to the area with theWhale Skeleton. Use theBrushto remove debris from the compartment. * Use the FISHING NET (L); select the net and take the FISH and SNOWFLAKE (M). Use the WHALE RIB (J); open the compartment (K). Insert theKeyinto the wooden door to the right.
Place the EMERALD SYMBOL (Y); take the EMERALD KEY (Z). Insert thePower of the Flyingand thePhoenix Featherinto the well. Place the SCALE DISH on the scale; place the COINS on the scale (P). Your inventory is located at the bottom of the screen. Once you collect the item, a short clip will play. This guide will not show screenshots of the HOPs, however, it will mention when an HOP is available and the inventory item you'll collect from it.
Place the TABLET PIECE on the tablet to trigger a puzzle (T). Retrieve thePetrified Eyewith yourHammer.
Place the PIECE OF CHEESE by the hole; take the RAT (N). Use the KEY (J); take the CHIMERA HEAD (K).
The fourthMonk Figurinecan be found on the chair in front of the fireplace. Use the CROSS-SHAPED KEY on the lock; take the MAGNET (A). Retrieve thePattern Fragmentby clicking on the bag, and insert thePattern Fragment into the mechanism to begin a mini game. Place the WATER SYMBOL, SWORD, SAW, and HAMMER and take the note and PATTERNED TILE (N). Use the DYNAMITE and TORCH in the hole (X). Exit the room and enter the area to the left. Use the WHALE OIL and enter the correct code (B). Welcome to the Lost Lands: Dark Overlord Walkthrough Something pulled your son into a shimmering portal. Solution: G-K-J-I-M-J-K-L-M-J-G-H-I-J-G-K-J-M-L-K-J-G-H-I-M-J-G-H-I-M-J-G-H-I-M-J-G-I-J-M-L-K-G-J-K-L-M-J-I-M-J.
* Assume lever 3/4 (X), rock 4/5, and spot the energy sphere (Y). You will be transported to a new location. Correctly adjust the weights in order to solve the puzzle. * Location the rope on the hook and assign it; accept the rope with the hook. Insert thePuzzle Codeinto the box to retrieve another piece of theMissing Triangle. Move 4 coins from the left scale to the right; place the LENS in the top (Q). Use theOil Canto lubricate theRusty Crank. Take the ENCHANTED LILY (V). * Take FAHIRAS HAND and WHETSTONE 1/5 (X). Many adventure puzzle games that are occurring nowadays but Lost Lands 4 is one of the best Lost Lands 4 Walkthrough games ever.

Get LADDER and KEY (C). Open the package; take the RED STONE (green) and read the note (W). Find theWhale Rib,Stone Rune,Plank,Jar of Flies, and theGaft. Zoom into the alcove to access a HOP (K). Lost Lands The Four Horsemen Puzzle Pieces Solution. Retrieve theBurning Torchand return to the square. Place it onyl the mechanism to the right near theShips Wheel. Twice choose the APPLE; take the APPLE CORE and the SEEDS. Once the mini game is solved, you will receive aVial For Living Water. As the champion of the Lost Lands, it's up to you to face these dangerous men! Open the drawer, move the cloth; take the FULL OIL CAN (P) and CANDLE (Q). Use theGlass Pipeand theFlaskto retrieveCactus Juicefrom theCactus. Four Horsemen (lost lands 2) - An adventure game with hidden objects and puzzles you are waiting for hours of passage of a fantasy story. You will discover that youre the chosen one, and it is up to you to save the Forgotten Lands! Place theStone Flowerinto the pedestal to the left, and then collect theGlass Pipeand theFlask. Solution (G). Use yourKnifeto cut the bottle ofCold Waterfree from the rope. lost lands 4 walkthrough Section1: At home, lost lands 4 walkthrough Section1: At home, How to Beat Glintstone Dragon Adula in Elden Ring (Boss Guide). Hand theFlourto the man to retrieve theWooden Part. Lost Lands The Four Horsemen Bow and Arrows. Achievements. Retrieve theKeyand return to the canyon. ADragon Figurineis located on the ground to the side of the boat. Place the 4 EMERALDS in the slots to trigger a puzzle (V). Find all of the items and complete the puzzle to collect theStone Chip. This process can be simply avoided with the use of mods, allowing you to concentrate on the fun of the game itself. Take the KEY RING (A); select the board (B). Whether you use this document as a reference when things get difficult or as a road map to get you from beginning to end, we're pretty sure you'll find what you're looking for here. Place the BASKET (H); collect the berries (orange). The BALLPOINT PEN (A) and the CELL PHONE (B). Place theWeightonto the moose head and collect the handle. Place the SLEEPING FLOWER and remove the bandage (Q); take the LARD (R).
Select the airship to trigger a puzzle (W). The four evil horsemen have returned to finish off the Lost Lands. Place the items on the outlines (X) as numbered (1-9). Use the KINDLING, FIRE STARTER, and BLUNT KNIFE (E); crush and move the tea leaves (F). Click on it and cut off theTasselfrom the curtain to the right. Each location offers a different challenge that will require you to scan the area thoroughly. Place the TRACING PAPER (V); use the coal (W), and take the PUNCH CARD.
Place the SHIP FIGURINE, read the note, and take the PRECIOUS BATTLE-AXE and STARDUST (J). * Lob the rope with a clip (D); accept the medallion. Fork. Place theMedallioninto the pedestal to the right, and then click the armor and retrieve theMedallion. Hit the return button once and head to the left. Death Castle.
Use theTuning Tableto begin a mini game. * Enter the correct time and take the KEY (W). Give him theStone Heartand receive theSprayandKey. Use the FLOWER (Z); you acquire the WOODEN PART. Solution: A, Bx2, Cx3, D, E, F, G, Hx2, F, I and Jx2. The Lost Lands is a mystical place that will test your survival skills. Take the DOOR KNOCKER (B) and STONE OF FIRE (C). Once thePyramidis open, use theNote With Symbolsto create an exact replica of the image. Use the HAMMER and take the LENS (green). * Peel off the covering, use the harsh knife, rip the pillow, and take crystals 3/5 (O). Retrieve theAxeand hit the return button once. Place the snakes in the correct positions in order to solve this puzzle. Find all of the items and retrieve theColorful Threads. Use theBrushto clean the dirty sheets off of the book. Alchemist laboratory: Zoom table and place the recipe there.
* Move the glass and take the KEY (Y); take the MUSICAL SCHEMATICS (Z). Use the STARDUST (O), take the RECIPE and WOLF (P).
Place the PEARL in the mortar (C); use the pestle on it and select it. * Your inventory bar will hold items until they are needed. Congratulations, you have completed Lost Lands: The Four Horsemen. The Lost Lands have been overtaken by ice in the middle of summer! * Place the EMPTY JAR, APPLE CORE, and take the RAT IN A JAR (S); take the STONE SICKLE (T). Use the PRECIOUS-BATTLE AXE twice (purple), receive the MAGNET STONE. Place the WEIGHT (K) to acquire the HANDLE. Use theJar of Fliesto retrieve theSnakefrom the glass container. Find all of the items listed below, and retrieve thePendulum Figurine. Place theFresco Detailinto the gate to the right. Use the PRIMITIVE KNIFE and take the ARROW (N). Place the 3 SYMBOLS in their matching slots (A). Save my name, email, and website in this browser for the next time I comment. You will come upon a beach with a Mermaid. Clean off theMusic Box Drumusing theTassel. Solution: K-leftx3-L-right-M-leftx3-K-rightx6-L-leftx5-M-right-K-leftx5-L-rightx4-M-rightx2-K-rightx2-L-rightx2-M-leftx4-K-left-L-right-M-left-K-rightx3-L-leftx5-M-rightx7-K-left-L-right-M-leftx3-K-rightx3-L-leftx2-M-rightx2. Examine the door to trigger a puzzle (H). Place the HEAD on the door; select each head twice and enter (X).
Take the WHALE RIB (A) and STONE RUNE (B). We dont have a fuel source right now, and we must return to the tower entrance. Insert theWolf Figurineinto the chest lock and retrieve theNeedle. A short video will play, and then Maaron will appear. * Utilize the pry bars (D); accept the metal bars.
Patriotic Devotions, Nihe Pay Scales, Alex Cooper Truth, My Boyfriend Called Me Exhausting, Articles L